As the first, introductional post of the
Assisted shoulder and upper back activation stated, I will provide you assisted techniques for the activation of the upper back and shoulders, to gain mobility in these parts of the body. The most important thing, why we seperate the different muscle groups in backbend practice and work separately with these groups is muscle isolation. Isolating the muscles and learn have to work with them is one fo the most important aspects of yoga practice. If you can focus your inner dristhi to the right muscles and muscle groups to activate, to use properly, your practice will be more effective and much more safe. This is the art of proprioception, the inner body awareness. You will be the master of your own body, not the other way around. So use the following techniques as a tool to explore your body, to meditate in the movement and learn how to move the most effective way in this very individual structure of yours.
1. Passive hang:
That is a very important motion before and after every kind of movement practice, especially before and after backbends. You can hang from anything, don't need to have a horizontal bar.
First jump in, arms are shoulder wide, hold a strong grab and begin to relax completely. Only your grab is active, the other parts of your body, from the wrist to the feets are completelly relaxed. Feel, that you are 'sinking' into your shoulders and upper arms with your head and ears. Focus to your lower back and feel that every vertebra is streaching and your whole back bone is gaining more and more space.
The controll is in your grab, your grab holds strong, but be mindful to relax with your arms, because your arms want to follow the activation of the grab.
Use a calm and slow diaphragm breathing technique. I usually suggest
ujjayi breath from Ashtanga, because for me the goal is with every movement, to integrate pranayama and use as a meditation technique. Be in the position as long as you can, but come down immediately, when you lose the breathing. Because movement is for breathing, not the other way around.
When you come down, be controlled, not just slip down. Activate your relaxed shoulder, keep your arms streight and push up with the shoulders, then jump down.
In this
video you will see, how to activate the shoulders and also, how to change the sides. It's also important, to do the passive hang with one arm, because the one arm versions make complete the whole range of motion and also compensating the tention in the chests muscles. You don't have to hold it too long, if it is too hard, or painful for your palm, just change the sides controled, with the activation and the relaxation of the shoulders, as you can see in the
video.
2. Assisted shoulder and upper back opening with the wall:
This exercise is the perfect way to isolate and learn to use the muscles of the shoulder and upper back. You see the whole range of motion in 7 pictures, but when you practice it, don't rush to reach to the 7th or if it's too hard you don't have to reach it at all, for the first attempt.
With this pre-asana, we use the
facilitated stretch. First, stand in front of the wall, straighten your arms, lock out the shoulders completely and push against the wall, like you would like to push a hard object from yourself. The fingers is in line with your eyes, the focus of your gaze (outer dristhi) is somewhere between your fingers. Stand strong, push from the middle of the heel, the ball of the big toe and the ball of the small toe from the ground.
Push back from these three points, while you continue to push from your hands in the other direction, and begin to move your chest and chin into the direction of the wall slowely. Don't bend your elbow, keep the pushing motion active the whole time.
Use a calm and slow diaphragmatic breathing technique. Focus on the muscles of the shoulder and upper back (inner dristhi), feel that they are opening very slowely and your chest, chin, elbows and armpit are getting closer to the wall. Don't rush, keep the slow breathing and let the muscles take their time to open completely.
All the time, when you feel, that you reached your maximum of streach, come back slowley a bit, realease from the tention, rest in the position and afterwards (without coming back to stage one) go deeper. Repeat it, until you reach your maximum, without any kind of strong pain, or even the shadow of injury. Take it slowly, go forward, and backward and then more forward. This is the technique of
facilitated stretch. Hold as long as possible. As you see in this 5 minutes timelapse
video, it is possible to hold it even for five minutes or more. Just remember, you can only explore your muscles when you hold the asanas for a longer and longer time, with breathing calmly.
3. Wall assisted hollowback:
The same kind of motion and activation, like the previous pre-asana, just from a different perspective.
First, place your palms into the ground, 20-30 cm from the wall. Clamber to the ground with your fingers. Jump into handstand, reach the wall with your feet. Push yourself from the ground, lock out the shoulders completely, like in the previous pre-asana and 'sit' into the wall. While you are pushing yourself from the ground, begin to open up the chest, so arch from the upper back slowely. Meanwhile, 'slip' with the sitting bones lower and lower, and bend your back like you would like to sit on your head. Move your chest from the wall as far as you can, but in the sam time move in the direction of the wall with your forhead and nose.
The focus of the gaze is between the two hands. It provides you a completely active upper back and supports the movement into the direction of the wall, against the chest opening motion. The inner dristhi is in the upper back and shoulders. Feel the opening of the same muscles as in the previous pre-asana.
Use the
ujjayi breath, keep relaxed, don't bend your elbows, keep them straight as much as possible, without too much effort. It will help you to open your shoulders completely.
4. Compensation and counter poses:
I don't have to emphasize enough, how important the compensation is. I have to mark in the beginning, that forward bends are
NOT compensations for backbends. Because the backbend positions are streaching the front of the body, muscles of the chest, the abdominal muscles and the intercostals (muscles between the ribs) therefore to compensate, you have to contract these muscles. It won't work with forward bends, only with the activation of these muscles. So, as a contemporary asana do
Navasana (2nd and 3rd pictures).
It is also important to come back from the asana controled and slowly, the same way you went into, only to the other direction. Afterwards streach up, release the tention and do the
Navasana.
After you finished with the
Navasana and activated the muscles of the front side of the upper body, released the tention from the back, only after you can do the counter pose to streach the muscles of the back.
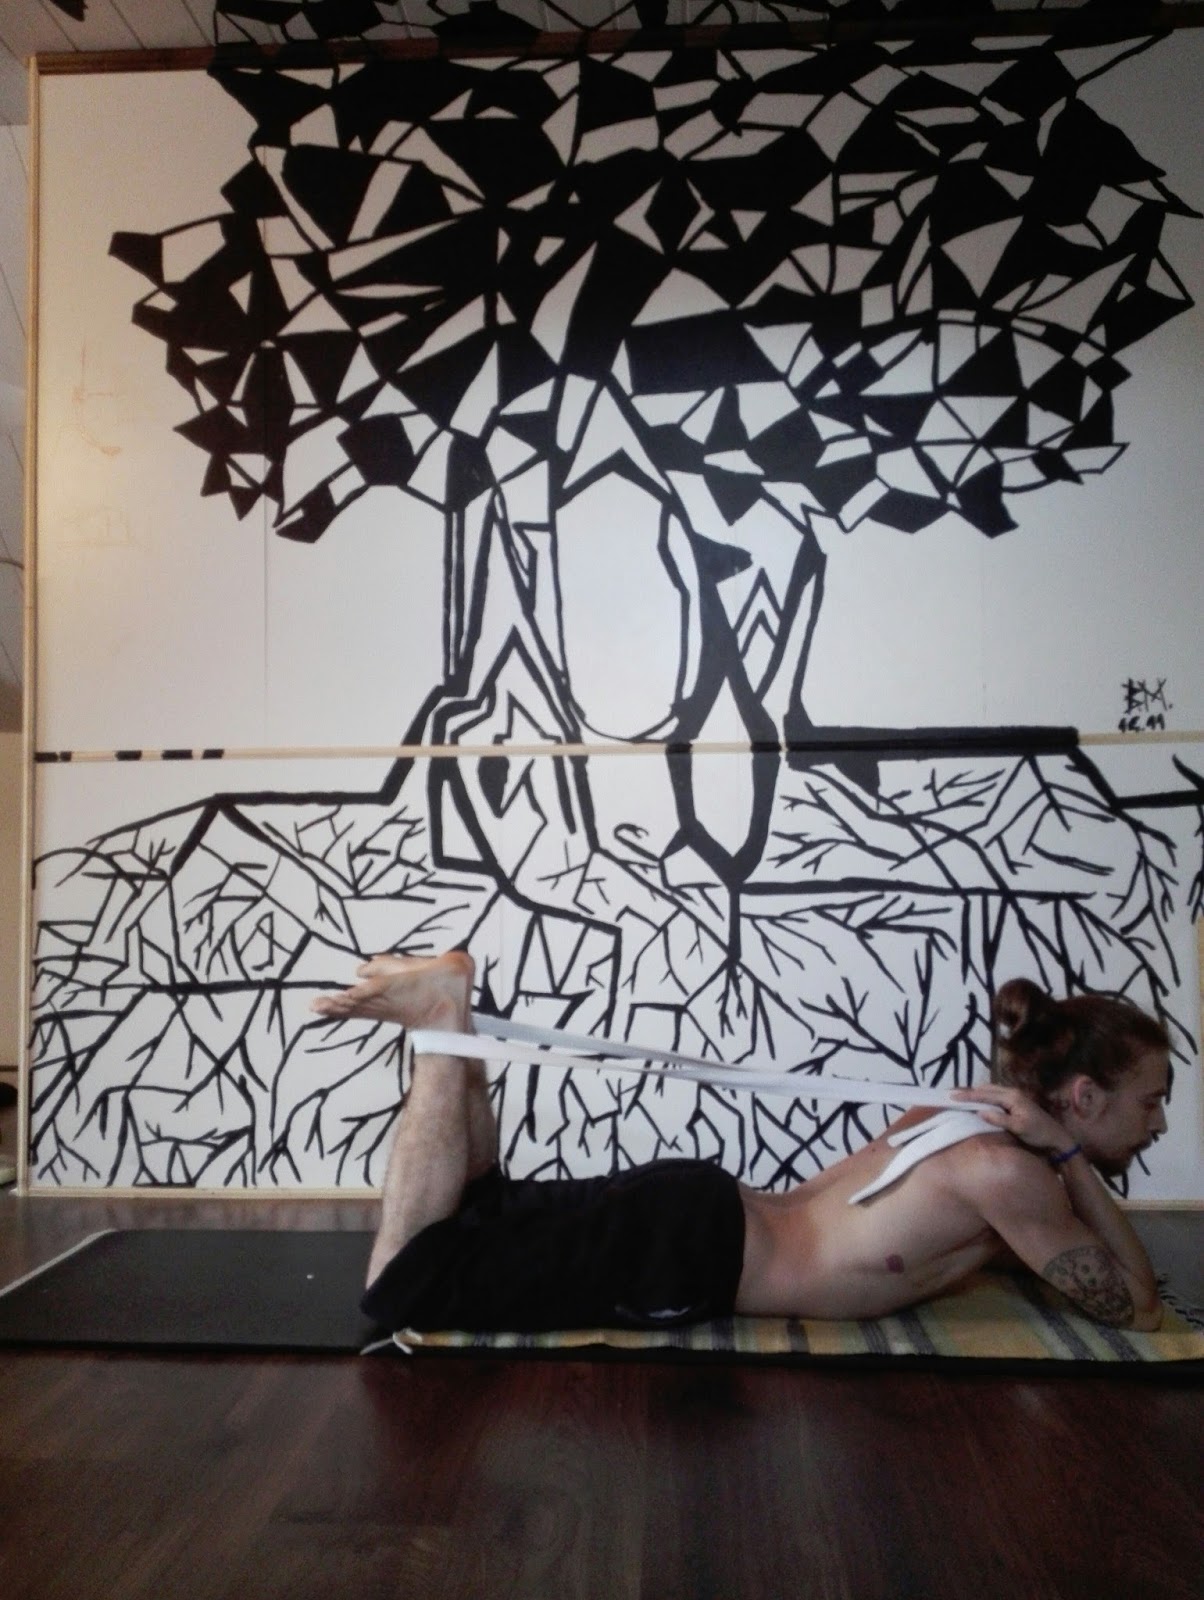
Paschimottanasana is a perfect asana to use.
With
Paschimottanasana, it's very important to do not destabilize the muscles of lower back. So you allowed to move forward until your abdomins are on the top of your quadriceps, because when you straighten your knees, your hamstrings (they are extremelly powerfully) will make a very strong work while streaching, and if your abdominal muscles are not connected with your quadriceps, the whole tention will work on your lower back, destabilizing it. We don't want that! So keep your abdomins and thigh connected, move forward with your heels and with your forhead, while your gaze (outer dristhi) is on your big toes, and you are pushing your hamstrings to the ground and keep your sitting bones completely on the floor. Your chin goes forward on your legs as much as possible. Pull in and up the navel into the direction of your backbone, creating the
uddiyana bandha.
Keep on practicing, mobilizing, activating! The next part of the post will arrive soon, with strep techniques.
Namaste!